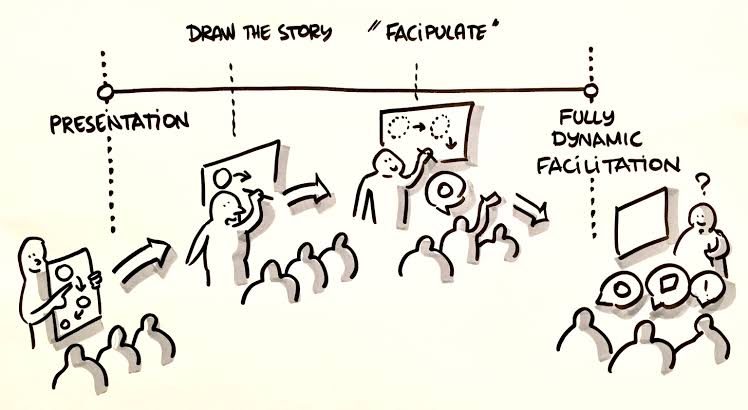
Visual communication is a powerful way to help people understand ideas, solve problems, and work together. Whether you are leading a workshop, teaching a class, or sharing ideas with a team, graphic facilitation can make your sessions more engaging and easier to follow. The good news is that you do not need to be a professional artist to use visuals well. With a few simple tools and smart techniques, anyone can become more confident when drawing ideas, creating visual notes, or leading group discussions.
Many people believe they are “not creative” because they do not draw often. However, graphic facilitation is not about making perfect artwork. It is about using simple shapes, words, colors, and layouts to help people see and understand information. Even people who work in science, engineering, business, or other technical fields can benefit from using visual tools. These practical tips will help you get started without spending a lot of money or needing advanced drawing skills.
Create a Better Visual Workspace
Having the right tools and an organized workspace makes visual communication much easier. Small changes to your setup can help you work faster and create clearer visual displays.
Make Your Own Marker Palette
One of the easiest ways to stay organized is by making your own marker palette. Instead of carrying loose markers everywhere, you can group your favorite colors together using strong tape such as duct tape or gaffer tape. This keeps your markers in one place, making it faster to switch colors while drawing.
A homemade marker palette also helps prevent markers from getting lost during meetings or workshops. It is inexpensive, takes only a few minutes to make, and can easily be customized with the colors you use most often. Having your markers ready to go allows you to focus more on your ideas instead of searching for supplies.
Use Affordable Whiteboards for Bigger Ideas
Large whiteboards are useful during brainstorming sessions, planning meetings, and training events. However, buying professional whiteboards can be expensive. A simple and affordable option is to use white tile board, which is commonly sold at hardware stores for home improvement projects.
These boards are lightweight, easy to clean, and provide plenty of space for writing and drawing. Before buying, check the surface to make sure it is smooth and free from damage. Placing two or more boards on sturdy easels creates a large writing area that works well for group discussions. When you are finished, the boards are easy to store because they lay flat against a wall.
Learn How to Hang Large Paper by Yourself
Sometimes you need to work alone while preparing for a meeting or presentation. Hanging large sheets of paper without help can be frustrating, especially if the paper keeps falling or folding.
Learning a simple method for hanging paper by yourself saves time and reduces stress. Prepare your tape ahead of time, attach one corner first, and slowly secure the rest of the sheet while smoothing it out. This creates a clean surface that is ready for drawing and writing. With a little practice, setting up large paper becomes a quick and easy part of your preparation.
Keep Your Visual Tools Ready for Success
Good visual communication is not only about drawing skills. The condition of your tools and the way you present your work also make a big difference.
Build Foam Board Display Towers
If you want to make your visual displays more interesting, consider using foam boards or sturdy cardboard to create simple display towers. These standing panels give you extra space to organize information and make your visuals easier for everyone in the room to see.
Foam board towers also help separate different topics or stages of a discussion. Instead of placing everything on one wall, you can create different sections that guide people through your ideas. These displays are lightweight, easy to move, and can be reused for future workshops or events.
Mixing different writing surfaces can also make your workspace more engaging. Whiteboards, glass walls, foam boards, and large paper sheets all provide different ways to present information and encourage participation.
Replace Old Markers Before They Slow You Down
One of the quickest ways to ruin a good presentation is by using dried-out markers. Faded colors and weak ink make it difficult for people to read your writing, especially from across the room.
Always check your markers before an important meeting or workshop. If the ink is running low, replace the marker or refill it if possible. Bright, bold colors make your drawings easier to see and help your ideas stand out.
Fresh markers also make drawing feel smoother and more enjoyable. Keeping a few extra markers available means you are always prepared when inspiration strikes or when someone else wants to join the conversation.
Final Thoughts
You do not need expensive equipment or professional art skills to improve your graphic facilitation. Small changes, such as organizing your markers, choosing affordable writing surfaces, creating flexible display areas, and keeping your supplies in good condition, can make a big difference in how you communicate ideas.
The goal of graphic facilitation is to help people think together, understand information more clearly, and remember important ideas. By practicing these simple techniques and keeping your visual tools ready, you can create engaging sessions that encourage participation and make collaboration easier for everyone involved.